RSPB Mosaics
Myself and Richard Dawson have been commissioned by the RSPB to create some way markers for Dovestone Reservoir in the Peak District. Each way marker will contain a small circular mosaic that depicts flora and fauna found in the area. I’m currently working on the drawings for the artwork but in the meantime here’s a mosaic of the RSPB logo which I did just to get me in the mood!
![]()
Hyde Indoor Market Artwork
Last year, myself and fellow artist Richard Dawson were commissioned by Tameside Metropolitan Borough Council (TMBC) to create some artwork for Hyde Indoor Market. The aim of the commission was to increase knowledge and awareness of the market – we worked with the market tenants to come up with a design and concept and worked with local community groups to produce some of the artwork.
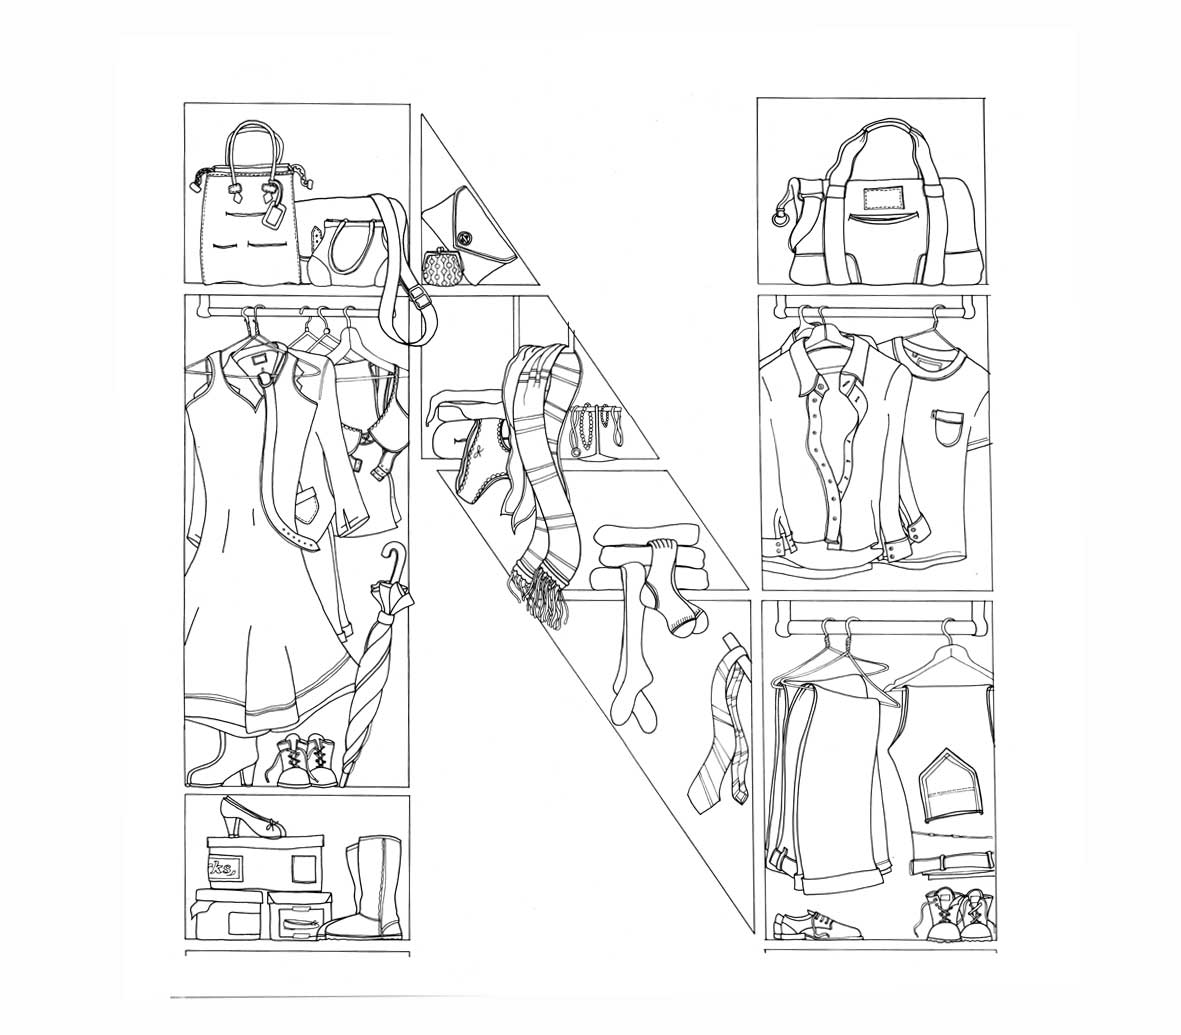
The final design is a sign that says ‘Hyde Indoor Market’, with each individual 3D letter depicting something sold within the market. The letters are a mixture of box frames containing various items, are clad in objects or have graphics applied to their surface.
This is the letter N, which depicts the ladies wear, menswear, footwear and jewellery stalls with an illustration of a wardrobe and the items contained within. The images show the first pencil drawing of the wardrobe and the inked-in versions and then the final one, which was scanned in, cleaned up in Photoshop and then colour rendered in Illustrator. The final letter has a wood effect finish on the sides, with a printed vinyl applied to the front with the illustration on.


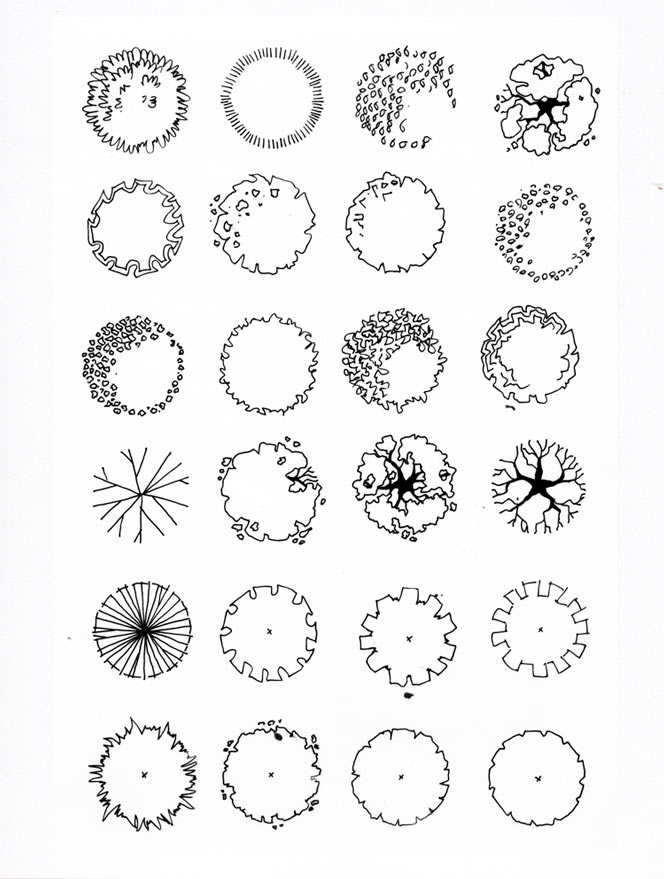
Garden design course completed
I’ve handed in the final garden design for my course so fingers crossed it passes the test! I’ll post a picture once I work out how to scan an A1 drawing. In the meantime, here are some tree graphics I’ve been practicing drawing – I like the simple styles the best.
Linocut – first attempt!
Here’s my first attempt at a linocut.., though to be honest, it was on japanese vinyl, which is a whole lot easier to cut. Next attempt is a reduction lino of the same image – hmmm – wish me luck!

It’s all gone course-tastic at Symons Towers
I’m busy doing two courses at the moment (see previous three posts) and am rushed off my feet trying to squeeze in all the work from the annual ‘its the end of the financial year and you have to finish this project now!’ rush. So blogs-a-plenty to come but for the meantime, I’m going to stick to what I’m doing on my two brilliant, if a bit disparate, courses: ‘Advanced Certificate in Garden Design’ and ‘The Complete Printmaker’.
Week Two and Three on The Complete Printmaker looked at Drypoint and Carborundum. I discovered a love of dremelling to make my drypoint plates. Here’s a couple I produced of some sea birds – the Avocet and the Sanderling. I’ll post the actual prints once they’ve dried off – they’re very similar (but the other way round!).


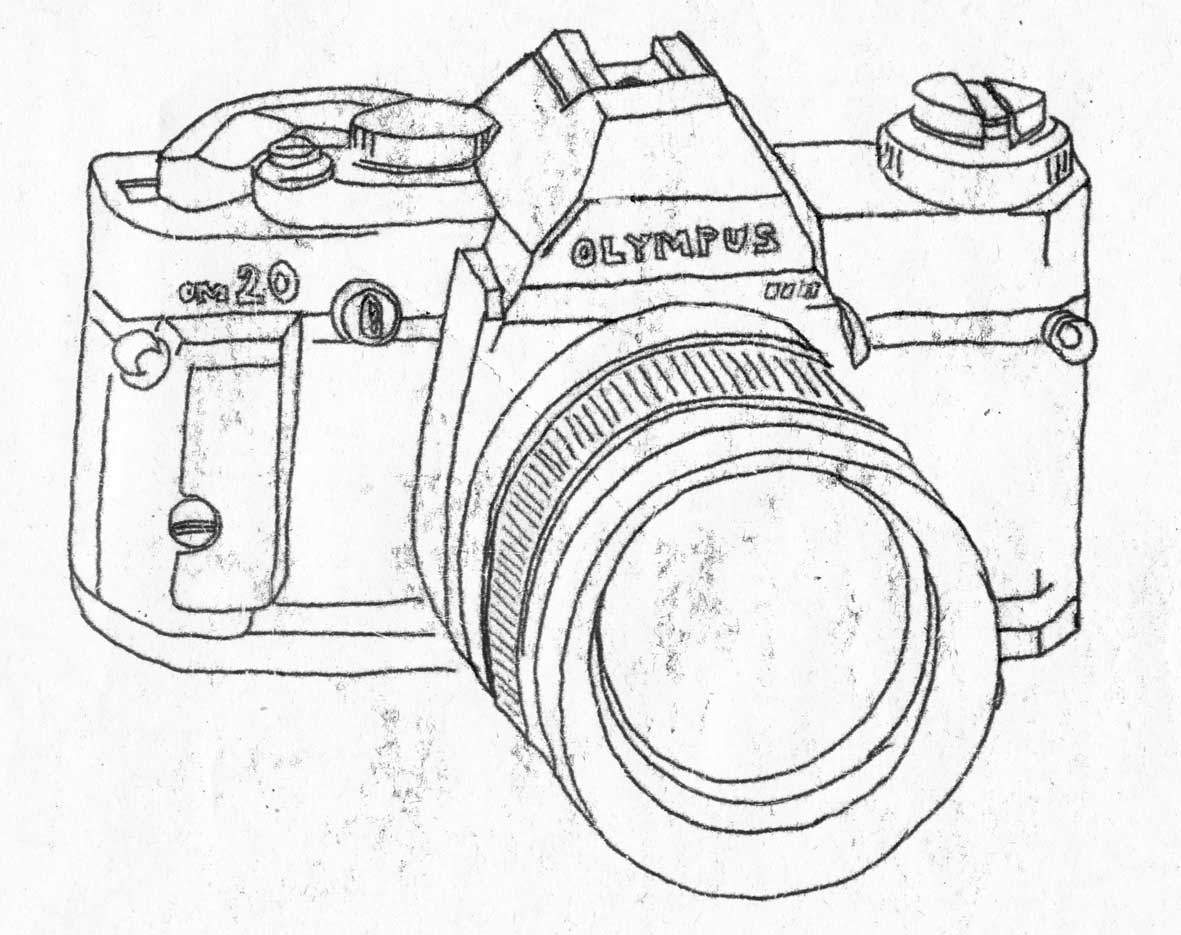
Line drawings of my cameras
As part of my printmaking course, I’m creating a series of prints of cameras using different techniques. As we started the course with trace monoprinting, I got into doing line drawings of the cameras I own and now I can’t seem to stop. Here are a few of them. I’ll post the actual prints once completed.

Praktica Novex KAF
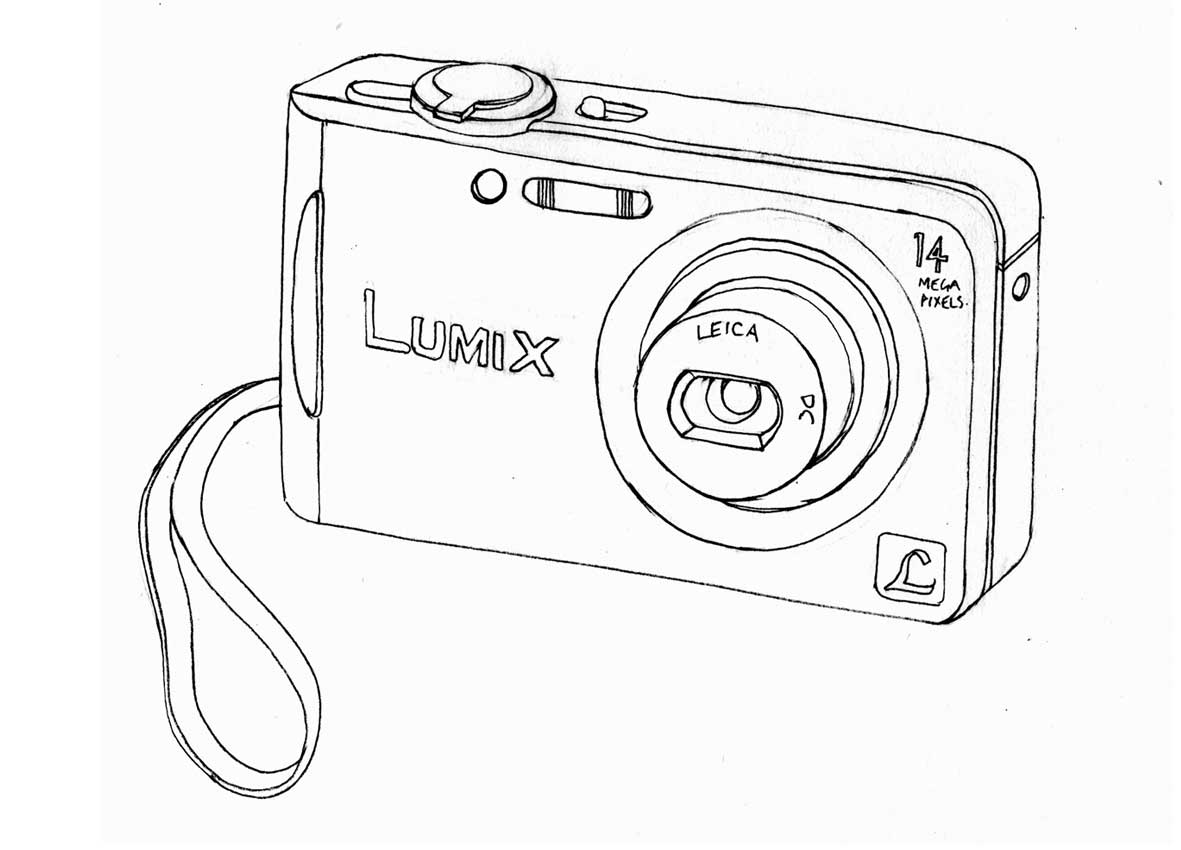
Panasonic Lumix FS-14

Boots 415 Disc Camera
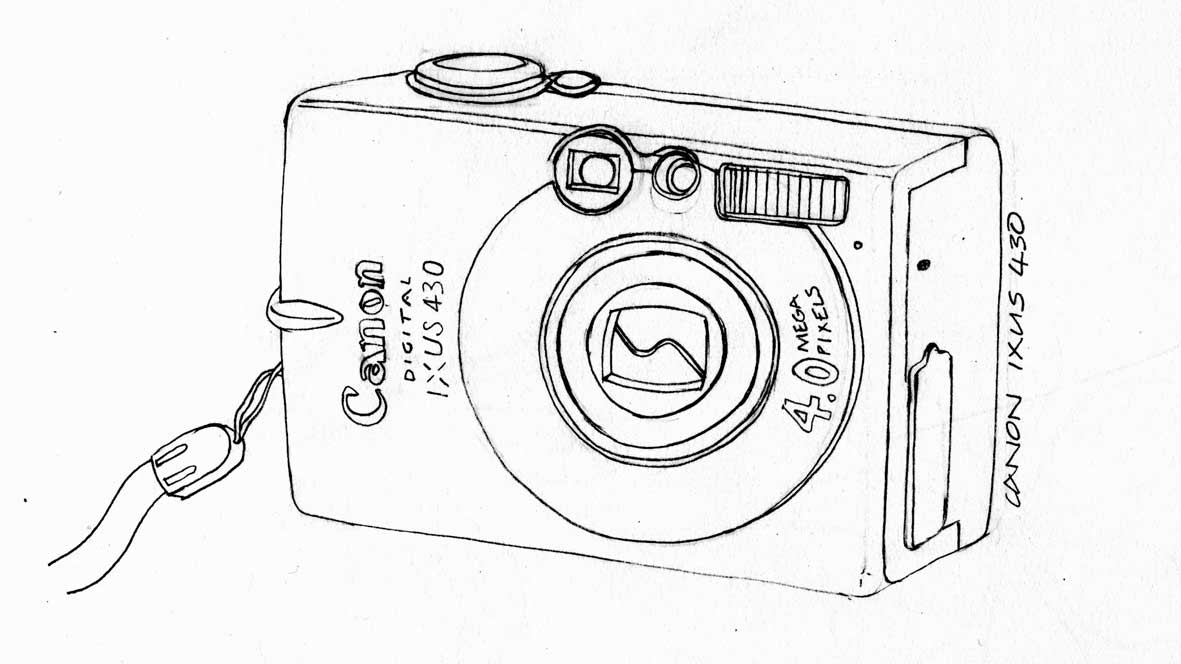
Canon Ixus 430
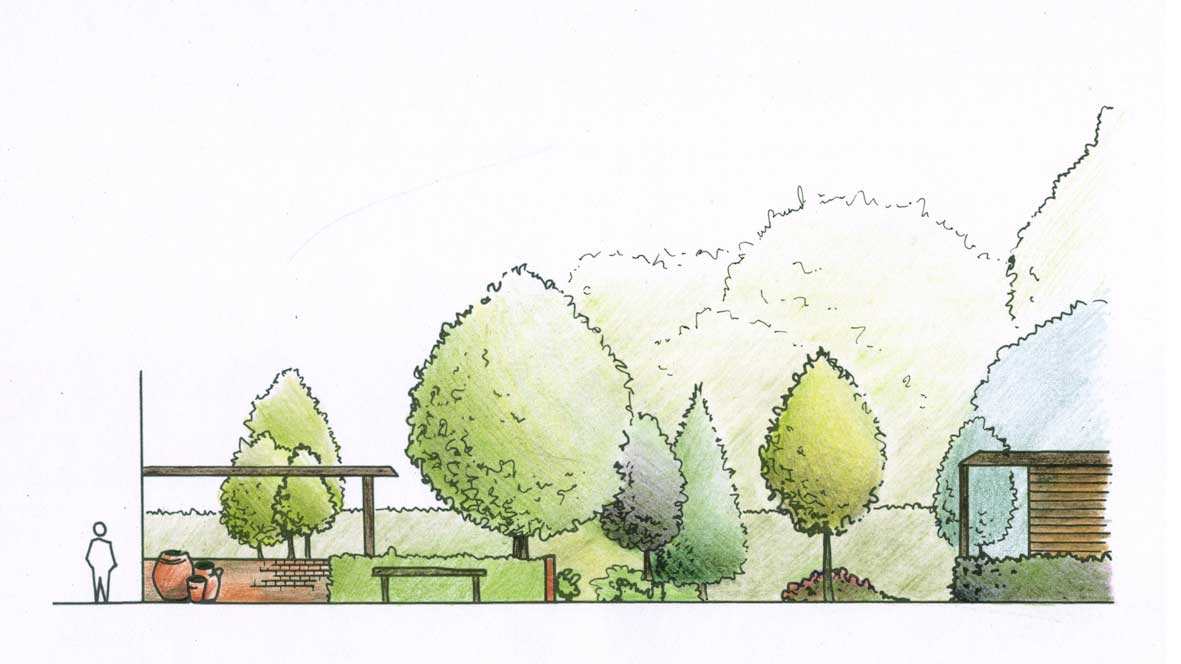
Garden Design – Elevations
As part of my garden design course (which finishes in 3 weeks), we have to include an elevation of the garden we have designed. On Friday, I finally forced myself to attempt one and here it is. It’s not the final version as there are a few errors but definitely good to practice. Check out my ‘colour rendering’ techniques too (yes, that is design speak for colouring in!).
Also, note the sudden appearance of trees in the background on the colour version. The garden (and surrounding gardens) have a backdrop of mature woodland and I think the inclusion of these in the elevation just adds a bit more depth.


Hyde Park Community Orchard Mosaics

Toad
I’ve only just got round to photographing (and uploading) some of the finished mosaic elements from the Hyde Park Community Orchard public artwork. The insects, birds and animals shown here are just a few of the mosaics created for the seating, wildlife discovery trail and pathway to the Orchard, all contained within an apple pip shape that formed a connecting element throughout the artwork.

Wasp

Swift

Red Admiral Butterfly

Nuthatch

Greenfinch

Honey Bee